•  

    +91-7902224040

  •  

    info@srishtirobotics.com

Blog

Amazon's recent introduction of the humanoid robot, Digit, into its warehouses has garnered significant attention. This article delves into the technical aspects of this innovation, shedding light on the robot's design, functionality, and integration into Amazon's operational ecosystem.


1. Design and Structure

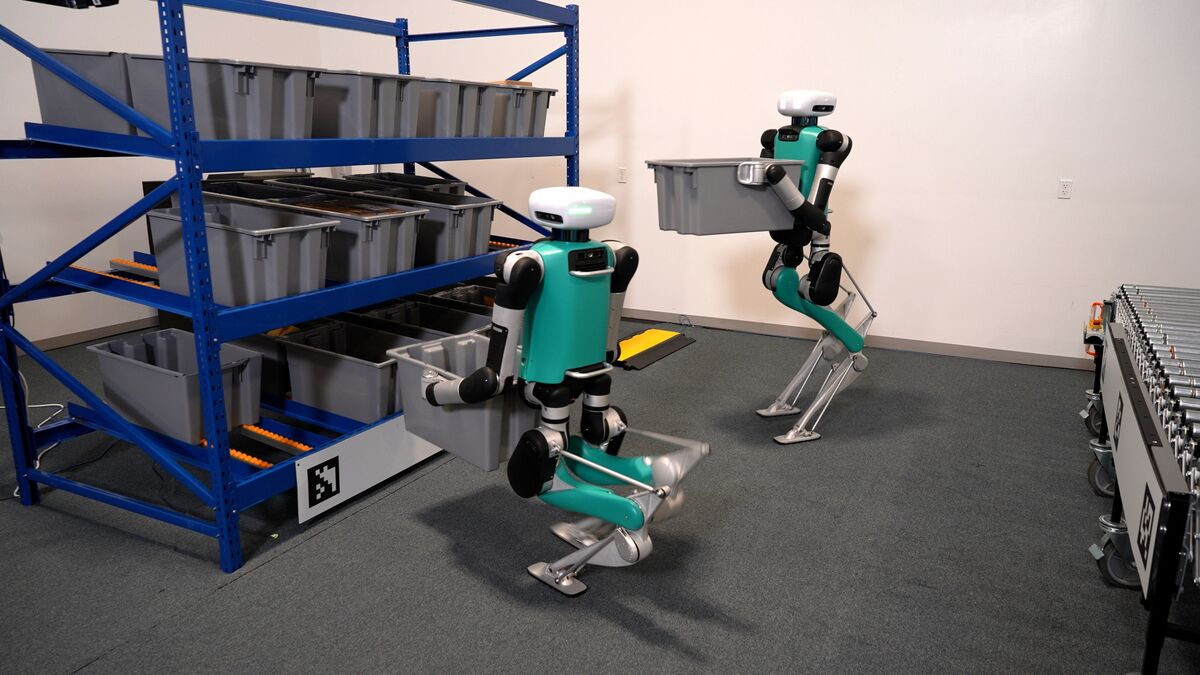
-Bipedal Movement: Unlike traditional robots that rely on wheels for movement, Digit is designed with two legs, allowing it to navigate terrains similar to humans. This bipedal design enables it to tackle obstacles like steps and stairs, offering more flexibility in human-centric environments.

-Grasping Mechanism: Digit is equipped with clasps that imitate human hands. This design allows it to pick up, hold, and move objects with precision, mimicking the dexterity of human fingers and palms.

 2. Core Functionalities

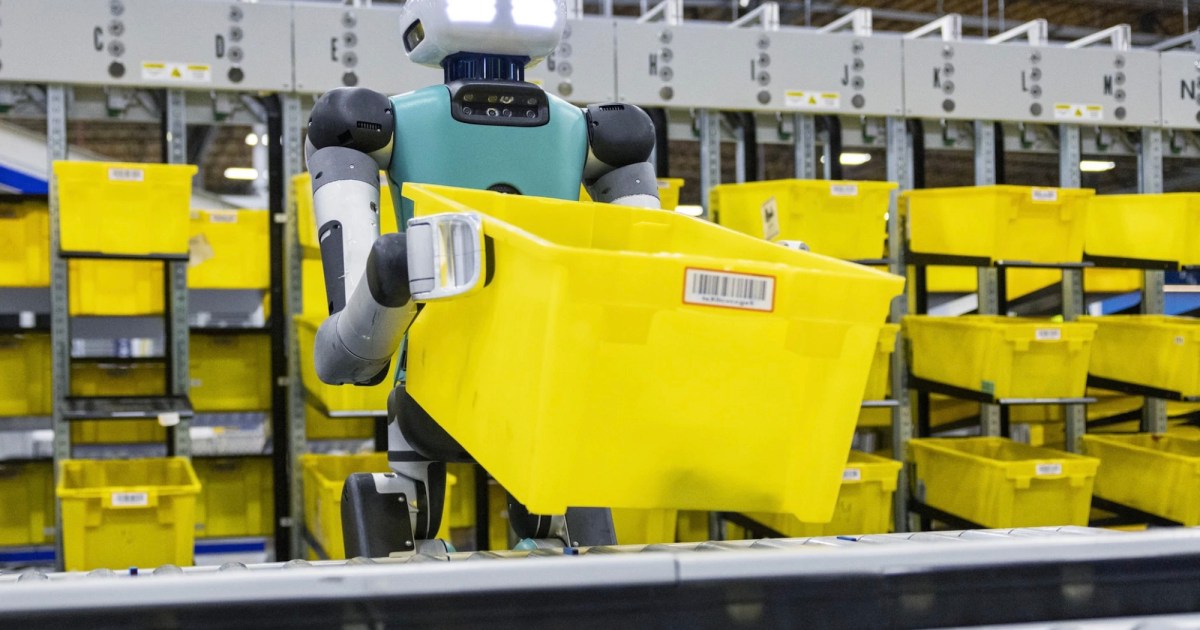
- Object Handling: One of the primary functions of Digit is to handle items in the warehouse. Its design allows it to grasp and move packages, containers, and customer orders efficiently.

- Tote Recycling: In its initial phase, Digit assists employees with the recycling of totes (containers) after they've been emptied of inventory. This task, though repetitive, requires precision, making it an ideal job for a robot like Digit.

3. Technical Partnerships

- Agility Robotics: Digit is a product of Agility Robotics, an Oregon-based startup specializing in robotic innovations. Amazon's collaboration with Agility Robotics has been instrumental in refining and enhancing Digit's capabilities.

4. Integration with Amazon's Ecosystem

- Collaborative Working: Amazon emphasizes that Digit is designed to work alongside human employees, not replace them. The robot's software is programmed to ensure collaborative operations, recognizing human movements and working in tandem with them.

- Safety Protocols: Given the robot's human-like movements, safety is paramount. Digit is equipped with sensors and algorithms to detect and avoid obstacles, ensuring a safe working environment.

5. Future Enhancements

- Improved Mobility: As technology evolves, there's potential for further enhancements in Digit's mobility. This could include advanced balance mechanisms, faster speeds, and even the ability to jump or climb.

- Advanced AI Integration: Future versions of Digit might be integrated with more advanced AI algorithms, allowing it to make decisions, recognize patterns, and even predict human movements for smoother collaboration.

- Task Expansion: While its current primary task revolves around tote recycling, there's potential for Digit to take on more complex tasks in the future, from inventory management to package sorting.

6. Technical Challenges

- Power Consumption: Bipedal movement, combined with advanced grasping mechanisms, might lead to significant power consumption. Ensuring Digit operates efficiently without frequent recharging is a challenge.

- Maintenance: Given its intricate design, maintenance could be more complex compared to traditional robots. Regular software updates, calibration of sensors, and physical wear and tear are aspects to consider.

In conclusion, Amazon's introduction of Digit represents a significant leap in warehouse automation. While it's a testament to the advancements in robotics, it also underscores the importance of human-robot collaboration in modern operational environments. As technology continues to evolve, it will be intriguing to see how humanoid robots like Digit reshape the future of industries.


The HM10 low energy Bluetooth module has the characteristics uuid and service uuid that you need to build in and communicates with your Arduino through the RX and TX pins. You need the softserial library to create an extra serial connection. 

HM-10 Services and Characteristics


BLE is all about services and characteristics and like all BLE devices, the HM-10 has a set of services and each service has a set of related characteristics. Characteristics are where the values are, some are READ, some are WRITE, and some are READ and WRITE.

 Select the service you need(for my HM10 it is 0000ffe0-0000-1000-8000-00805f9b34fb), get the characteristics of the selected services, select the characteristic (for my HM10 it is 0000ffe1-0000-1000-8000-00805f9b34fb)

When you tell the HM-10 to transmit “HELLO”, it first sets the value of the custom characteristic to “HELLO” and then it sends out a notification telling the remote device “Hey, I have new data, come and get it.” The remote device is scanning for the notifications and when it receives one it knows there is a new value, so it reads the data and then sends back a message saying “Thanks, I have it”.

The custom characteristic can hold up to 20 characters, this means to send a string longer than 20 characters the HM-10 splits the data into 20 character segments and sends each one in turn until none are left.


Get Started With the HM-10

You need an Android device to read the services and characteristics from the HM-10. Power on the HM-10, you can use an Arduino for this but all we need is 5V to HM-10 VCC and GND to HM-10 GND.

The LED on the HM-10 should be flashing if it gets the proper voltage. When a connection is established the LED will be become solid.


Reading the characteristics UUID of the HM-10 using BLE Scanner

Depending on your Android device and the version of Android you are running the HM-10 may or may not show up when searching for Bluetooth devices under the Android Settings.

If your device does not find the HM-10 under Bluetooth settings, try using the BLE Scanner app.

The modules can be paired using the default pin 000000

To connect to the HM-10 and to read the services and characteristics UUIDs we need to use a BLE Scanner app.

Here are two apps you can use anyone from this

BLE Scanner: Download from Google Play

B-BLE: Download from Google Play

Open the BLE Scanner app and find the HM-10. Tap the CONNECT button to get the app to connect to the HM-10 and start reading its properties.


Clicking the small down arrows will expand the services and display the characteristics.

Tapping one of the R labels will read the characteristic value. For example, under Device Name, tapping the R reads and then shows the device name value.

Under Custom Service you can see the HM-10s default service and characteristic values. You can also see that the HM-10s custom characteristic has Read, Write, and Notify attributes.

HM10 Interface with Arduino and MIT App Inventor


We are going to send a message (abcdefghijk) and get the bytes obtained in Arduino UNO

Here is the screenshot of MIT App Inventor


Here is the Arduino code for the same

#include <SoftwareSerial.h> // El TXD del módulo al pin 2 (RX) del Arduino. // El RXD del módulo al pin 3 (TX) del Arduino.

SoftwareSerial HM10(2, 3);

#define LED13 13 byte caracter = "";

// char caracter = "";

String mensaje = "";

void setup()

{

Serial.begin(9600);

HM10.begin(9600);

pinMode(LED13, OUTPUT);

}

void loop(){

if(HM10.available())

{

caracter = HM10.read();

Serial.println(caracter);

mensaje = mensaje + caracter;

if(caracter == NULL )

{

Serial.println(mensaje);

if (mensaje.indexOf("on13")>= 0)

{

digitalWrite(LED13, HIGH);

}

if (mensaje.indexOf("off13")>= 0)

{

digitalWrite(LED13, LOW);

}

mensaje = "";

delay(100);

}

}

}


Key features

  • RP2040 microcontroller chip designed by Raspberry Pi in the United Kingdom
  • Dual-core Arm Cortex M0+ processor, flexible clock running up to 133 MHz
  • 264KB of SRAM, and 2MB of on-board Flash memory
  • Castellated module allows soldering direct to carrier boards
  • USB 1.1 with device and host support
  • Low-power sleep and dormant modes
  • Drag-and-drop programming using mass storage over USB
  • 26 × multi-function GPIO pins
  • 2 × SPI, 2 × I2C, 2 × UART, 3 × 12-bit ADC, 16 × controllable PWM channels
  • Accurate clock and timer on-chip
  • Temperature sensor
  • Accelerated floating-point libraries on-chip
  • 8 × Programmable I/O (PIO) state machines for custom peripheral support


Can We Help ?

+91-7902224040